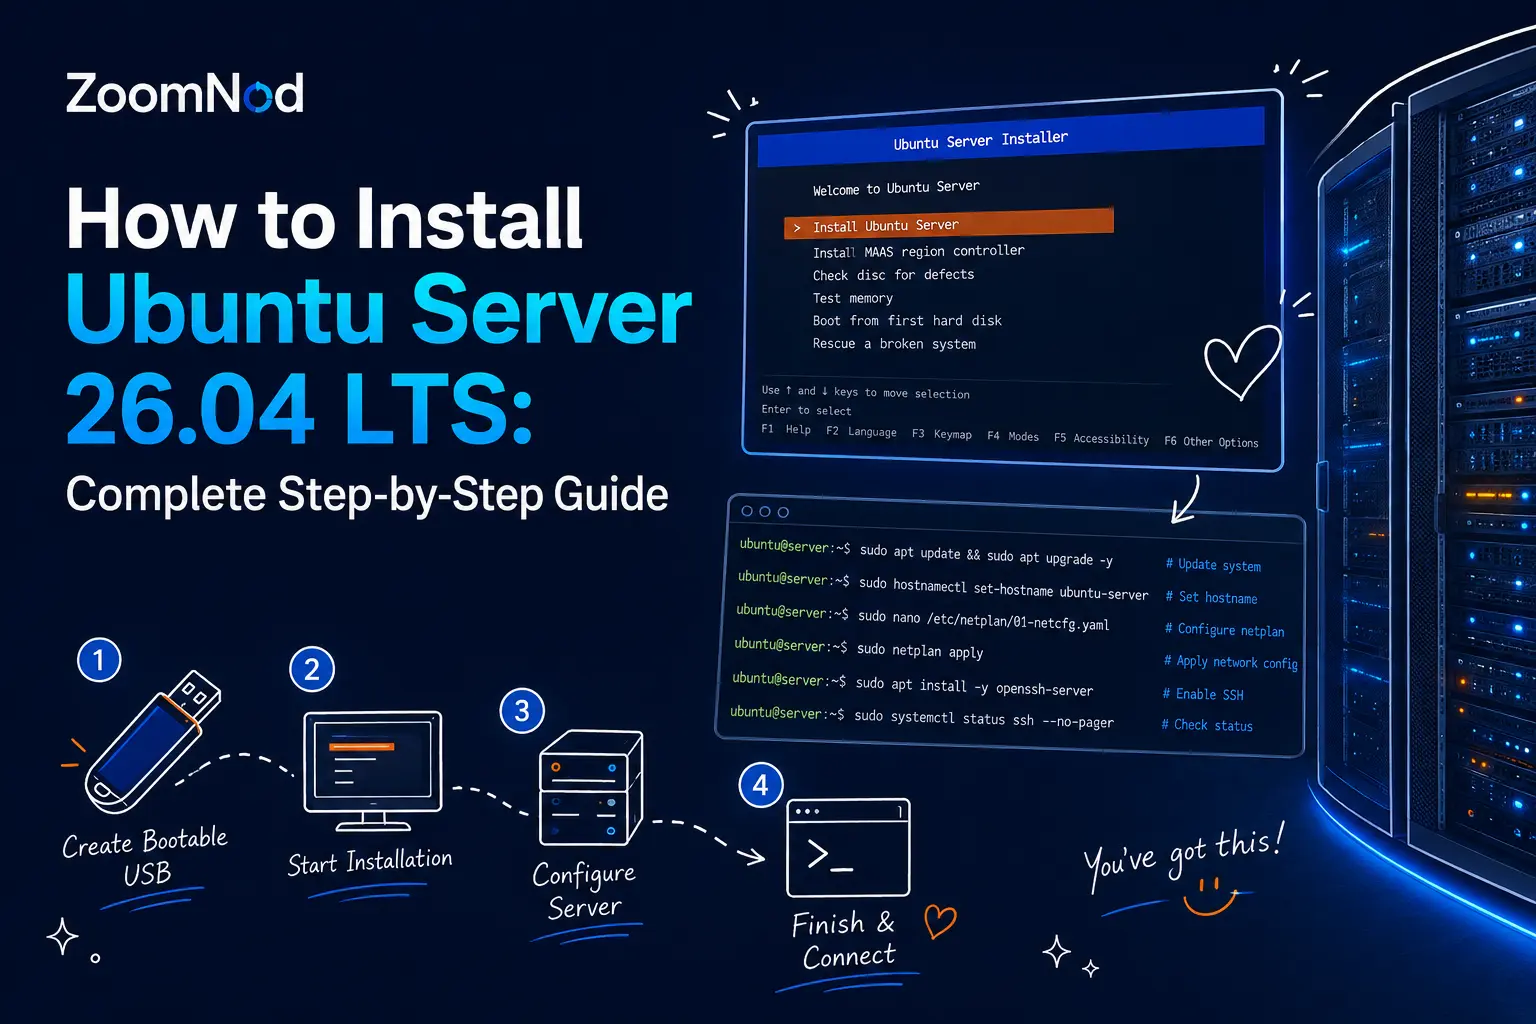
How to Install Ubuntu Server 26.04 LTS: Complete Step-by-Step Guide
To install Ubuntu Server, download the official server ISO, verify its checksum and signature, create bootable media, boot the target machine, choose the language and keyboard, configure networking and storage, create an administrator account, install OpenSSH, complete the installation, reboot, update the system, and apply security, monitoring, and backup settings.
The instructions use Ubuntu Server 26.04 LTS, released in April 2026, with standard security maintenance through May 2031. The installer workflow is similar for Ubuntu Server 24.04 LTS, although screen labels and available packages can differ.
The process applies to physical servers, local virtual machines, and dedicated-server installations. A VPS normally uses a prebuilt cloud image from the hosting provider rather than an ISO installer.
Ubuntu Server Installation Overview
| Stage | Main task | Result |
|---|---|---|
| 1 | Check requirements | Compatible hardware |
| 2 | Download and verify ISO | Trusted installation image |
| 3 | Create bootable USB or attach ISO | Bootable installation media |
| 4 | Configure firmware boot | Installer starts |
| 5 | Choose language, keyboard, and network | Basic system settings |
| 6 | Configure storage | Partitions and filesystems |
| 7 | Create user and install SSH | Administrative access |
| 8 | Install and reboot | Working Ubuntu Server |
| 9 | Update and secure | Production-ready foundation |
| 10 | Monitor and back up | Operational recovery |
Ubuntu Server 26.04 System Requirements
Ubuntu’s basic installation documentation lists 2 GB RAM and 5 GB disk space as recommended minimums for the tutorial. A practical production server normally needs more capacity for logs, updates, applications, backups, and growth.
| Use case | CPU | RAM | Storage starting point |
|---|---|---|---|
| Learning or minimal utility server | 1–2 cores | 2 GB | 20 GB |
| Small web or application server | 2 cores | 4 GB | 40–80 GB SSD |
| File or collaboration server | 2–4 cores | 4–8 GB | Based on stored data |
| Database or virtualization host | Workload specific | 16 GB+ | Fast redundant storage |
| Production dedicated server | Workload specific | 8 GB+ | Application, logs, backups, and growth |
Ubuntu Server supports several 64-bit architectures, including AMD64, ARM64, IBM POWER, and IBM Z. The correct ISO and installation method depend on the hardware platform.
Should You Install Ubuntu 26.04 or 24.04 LTS?
Ubuntu 26.04 LTS is the current LTS release in July 2026 and receives standard security maintenance until May 2031. Ubuntu 24.04 LTS receives standard security maintenance until May 2029.
Choose Ubuntu 26.04 LTS when:
- The hardware and application support it.
- You want the longest remaining standard support period.
- You need newer kernels, drivers, compilers, or packages.
- You are building a new environment rather than matching an older fleet.
Choose Ubuntu 24.04 LTS when:
- A commercial application certifies only 24.04.
- A control panel or security product has not certified 26.04.
- You need to match an existing supported environment.
- Migration testing for 26.04 is incomplete.
Use Best Server OS in 2026 to compare Ubuntu with Debian, AlmaLinux, Rocky Linux, Windows Server, and other platforms.
Step 1: Plan the Server Role
Define what the server will do before installation. The role affects storage, networking, packages, security, and recovery.
- Web or application server.
- Database server.
- Virtualization host.
- File server.
- Backup repository.
- Git server.
- Nextcloud server.
- Monitoring node.
- Game server.
- Container host.
A server should not collect unrelated roles simply because capacity is available. Separating public applications, databases, backups, and administrative services can reduce attack surface and simplify recovery.
Step 2: Plan Storage Before Installation
Changing the storage layout after deployment is difficult. Estimate space for the operating system, application data, logs, databases, temporary files, snapshots, and growth.
Simple single-disk layout
A small server can use the installer’s guided storage option. The installer creates the required boot and root filesystems and can use LVM to improve future flexibility.
Separate application data
Large databases, websites, virtual machines, and file shares can use separate logical volumes or disks. This prevents application data from consuming every byte of the root filesystem.
RAID considerations
Production servers may use mirrored or parity storage. RAID improves availability after selected drive failures but does not replace backup. Plan hot spares, monitoring, rebuild procedures, and off-server copies.
Do not create a complex layout that nobody can recover. Document partitions, filesystems, mount points, encryption, RAID, LVM, and replacement steps.
Step 3: Download the Ubuntu Server ISO
Download the server install image for the target architecture from Ubuntu’s official release infrastructure. For common Intel and AMD servers, use the AMD64 server ISO.
Record:
- Release version.
- Architecture.
- ISO filename.
- Download date.
- Checksum file.
- Signature file.
The server ISO includes the installer, not a graphical desktop environment.
Step 4: Verify the Ubuntu ISO
Verification checks that the file matches the published checksum and that the expected Ubuntu release key signed the checksum list.
Place the ISO, SHA256SUMS, and SHA256SUMS.gpg in one directory.
Verify the checksum:
sha256sum -c SHA256SUMS 2>&1 | grep OKThe selected ISO should report OK.
Verify the checksum signature with GnuPG using the official Ubuntu signing key obtained through an approved method:
gpg --keyid-format long --verify \
  SHA256SUMS.gpg SHA256SUMS
Do not continue when the checksum fails, the signature cannot be verified, or the key fingerprint does not match the expected Ubuntu release key. Redownload the files from trusted infrastructure.
Step 5: Create Bootable Installation Media
Physical server or computer
Use a trusted USB imaging tool to write the ISO to a USB drive. The process erases the selected USB device. Confirm the target drive carefully.
On Linux, a raw write can be performed with dd, but an incorrect output device can destroy another disk:
sudo dd if=ubuntu-server.iso \
  of=/dev/sdX bs=4M status=progress conv=fsync
Replace /dev/sdX with the whole USB device, not a partition. Verify with lsblk before running the command.
Dedicated server with remote management
Use IPMI, iDRAC, iLO, KVM-over-IP, or another remote console to attach the ISO as virtual media. Confirm that the management interface is protected by strong credentials, restricted network access, and current firmware.
Virtual machine
Create the VM, assign CPU, RAM, storage, and network interfaces, then attach the ISO to the virtual optical drive. Take note of the virtual firmware mode and disk controller type.
Step 6: Configure BIOS or UEFI Boot
- Insert the USB drive or attach the virtual ISO.
- Power on or restart the machine.
- Open the boot menu or firmware settings.
- Select the USB or virtual optical media.
- Prefer UEFI mode for modern systems.
- Confirm that the installer starts.
Secure Boot is supported in common Ubuntu configurations. Specialized third-party kernel modules or drivers may require additional signing or enrollment steps.
After installation, remove the media or change the boot order so the machine boots from the installed disk.
Step 7: Choose the Installer Language
Select the installer language. You can adjust the server’s locale later. Global infrastructure teams often choose English because command output, logs, and troubleshooting documentation are widely available in that language.
Step 8: Choose the Keyboard Layout
Select the correct keyboard layout and test special characters. An incorrect layout can create password and command-entry problems, especially with symbols used in secure passwords.
Remote SSH sessions later use the client computer’s input method, but the local console still uses the configured server keyboard map.
Step 9: Choose the Installation Type
The installer may offer a standard Ubuntu Server installation and a minimized option.
Standard installation
Choose standard installation when you want common server utilities and a familiar administrative environment.
Minimized installation
Choose minimized installation for a smaller attack surface and footprint when the team knows which packages it must add later.
Minimal systems need deliberate package management. Do not remove tools required for recovery, networking, storage, or remote access without an alternative.
Step 10: Configure Network Interfaces
The installer detects available network interfaces. DHCP is the simplest option for an initial installation. Production servers often use a static address or a DHCP reservation.
Record:
- Interface name.
- MAC address.
- IPv4 address and prefix.
- Default gateway.
- DNS resolvers.
- IPv6 address and gateway.
- VLAN ID when used.
- Bonding or redundancy configuration.
Static IPv4 example
| Setting | Example |
|---|---|
| Address | 192.0.2.20/24 |
| Gateway | 192.0.2.1 |
| DNS | Provider or organizational resolvers |
Use addresses supplied by the network administrator or hosting provider. Documentation examples such as 192.0.2.0/24 are not real public addresses.
Proxy configuration
Enter an HTTP proxy only when the network requires one. An incorrect proxy prevents package downloads and installer updates.
Package mirror
Use the default Ubuntu archive mirror or an approved nearby mirror. The mirror must match organizational security and availability requirements.
Step 11: Configure Storage
The storage screen requires particular care. Verify the selected disks before writing changes.
Guided storage
Guided storage is appropriate for many small servers and VMs. It can use the entire disk and configure LVM.
Custom storage
Use custom storage when you need:
- Separate filesystems.
- Software RAID.
- Multiple disks.
- Encryption.
- Specific boot partitions.
- Dedicated application volumes.
- Existing data preservation.
Practical partition considerations
/boot/efifor UEFI boot./bootwhen required by encryption or platform design./for the operating system./varfor databases, logs, containers, or websites when growth is significant./homefor interactive user data.- Swap according to memory, workload, and hibernation requirements.
Separate filesystems can limit the effect of one area filling, but poor sizing can waste capacity. LVM provides more flexible allocation than fixed partitions.
Encryption
Full-disk or volume encryption protects data when drives are removed or stolen. It also creates boot and key-management requirements. A remote server that needs manual passphrase entry after every reboot may require a remote console or network-bound unlocking design.
Step 12: Create the Administrator Account
Enter:
- Your name.
- A server hostname.
- A unique administrator username.
- A strong password.
Use a named account rather than a generic shared username. Store the password in an approved password manager. The installation account receives sudo privileges.
Choose a descriptive hostname such as:
web01.example.com
db01.example.com
backup01.example.com
The hostname should describe the system role without exposing unnecessary sensitive information.
Step 13: Configure Ubuntu Pro When Required
The installer may offer Ubuntu Pro. Standard Ubuntu LTS security maintenance is available without a Pro subscription for packages in the supported base repositories. Ubuntu Pro adds expanded security coverage, Livepatch, compliance tooling, and optional enterprise support.
Attach Pro during installation only when the organization has an appropriate token and policy. It can also be attached later.
Step 14: Install OpenSSH Server
Select OpenSSH Server when the machine will be administered remotely. Import SSH keys from an approved source when available, and verify every imported key.
Do not rely only on password authentication for an internet-facing server. After installation, test SSH keys, create access controls, and disable direct root login.
If OpenSSH was not selected during installation, install it later from the local console:
sudo apt update
sudo apt install openssh-server -y
sudo systemctl enable --now ssh
Verify:
sudo systemctl status ssh
sudo ss -ltnp | grep ':22'
Step 15: Choose Featured Server Snaps Carefully
The installer may offer optional server applications. Install only software required for the planned role because each additional application increases attack surface, resource use, and maintenance.
For a clean base system, skip optional applications and deploy them after updating, securing, monitoring, and backing up the operating system.
Step 16: Complete Installation and Reboot
The installer copies files, installs the bootloader, configures packages, and applies selected settings. When prompted:
- Confirm the installation completed without errors.
- Remove the USB drive or detach the ISO.
- Press Enter to reboot.
- Verify the system boots from the installed disk.
If the machine returns to the installer, remove the media or change the firmware boot order.
Step 17: Log In and Verify the System
Log in with the administrator account created during installation.
Check the release:
cat /etc/os-release
uname -r
hostnamectl
timedatectl
Check storage and memory:
lsblk -f
df -h
free -h
swapon --show
Check networking:
ip address
ip route
resolvectl status
Check failed services:
systemctl --failedStep 18: Update Ubuntu Server
sudo apt update
sudo apt upgrade -y
sudo apt autoremove --purge -y
Check whether a reboot is required:
test -f /run/reboot-required && echo "Reboot required"Reboot when required:
sudo rebootAfter reconnecting, verify the kernel and check again for failed services.
Step 19: Configure Time and Time Synchronization
Servers commonly use UTC to simplify log comparison across regions.
sudo timedatectl set-timezone UTC
timedatectl status
Accurate time is required for TLS certificates, authentication, databases, logs, monitoring, and incident investigation.
Step 20: Configure SSH Keys
Generate an Ed25519 key on the administrator’s computer:
ssh-keygen -t ed25519 -a 100Copy it to the server:
ssh-copy-id adminuser@SERVER_IPTest the key in a second terminal. Then create a hardening file:
sudo nano /etc/ssh/sshd_config.d/99-hardening.confPermitRootLogin no
PubkeyAuthentication yes
PasswordAuthentication no
PermitEmptyPasswords no
MaxAuthTries 3
LoginGraceTime 30
AllowUsers adminuserValidate and reload:
sudo sshd -t
sudo systemctl reload ssh
Do not disable passwords until every required user has tested key access and a recovery console is available.
Step 21: Configure the Firewall
Ubuntu includes UFW as a simplified firewall interface, but it is disabled by default.
sudo apt install ufw -y
sudo ufw default deny incoming
sudo ufw default allow outgoing
sudo ufw allow OpenSSH
sudo ufw enable
sudo ufw status verbose
Open only the ports required by the server role. A web server may need:
sudo ufw allow 80/tcp
sudo ufw allow 443/tcp
Verify public reachability using the techniques in Port Ping: How to Ping a Specific Port.
Step 22: Enable Automatic Security Updates
sudo apt install unattended-upgrades -y
sudo unattended-upgrade --dry-run --debug
Review:
cat /etc/apt/apt.conf.d/20auto-upgrades
sudo less /var/log/unattended-upgrades/unattended-upgrades.log
Automatic updates still require monitoring, maintenance planning, and reboot checks.
Step 23: Review AppArmor
AppArmor provides mandatory access controls for supported applications and is enabled by default on Ubuntu.
sudo aa-statusProfiles can operate in complain or enforce mode. Test custom profiles before enforcing them on production workloads because an incorrect rule can block legitimate operations.
Step 24: Install Basic Administration Tools
sudo apt install -y curl wget git unzip zip rsync \
  ca-certificates htop tmux lsof
Install only required packages. Each tool needs updates and can increase the attack surface.
Step 25: Configure Monitoring
Monitor:
- Server availability.
- CPU and load.
- Memory and swap.
- Disk capacity and inode use.
- Storage health and latency.
- Network traffic and errors.
- Failed services.
- Authentication failures.
- Application health.
- Backup success.
- Certificate expiry.
Useful commands:
uptime
free -h
df -h
df -i
systemctl --failed
journalctl -p warning --since today
sudo ss -tulpn
Compare monitoring options in Best Linux System Monitor and The Best Server Management Tool.
Step 26: Configure Backups
Back up:
- Application data.
- Databases.
- System and service configuration.
- Firewall and SSH settings.
- Certificates.
- Scheduled tasks.
- Deployment instructions.
- Encryption keys through a secure process.
Keep at least one copy outside the server and test restoration. Follow How to Back Up and Restore Data on a VPS for a practical recovery framework.
RAID, LVM snapshots, virtual-machine snapshots, and provider snapshots do not replace independent backups.
Step 27: Deploy the Server Role
Web server
Install Nginx or Apache after the base server is secure. Configure separate application users, virtual hosts, HTTPS, logs, monitoring, and backups.
Git server
Use How to Run Your Own Git Server for a source-control deployment.
Nextcloud server
Use How to Install Nextcloud on a VPS. Size storage and backups for user data rather than only the application.
NFS file server
Use How to Configure an NFS Server and Client. Restrict exports to approved networks and clients.
Hosting control panel
Compare Best Control Panel for Linux VPS, Best Web Hosting Control Panel, and Plesk vs cPanel before installing a panel. Many panels require a clean supported operating system.
Ubuntu Server Storage and Filesystem Checklist
- All expected disks are visible.
- The boot disk is correct.
- UEFI or legacy boot mode is documented.
- LVM volume groups and logical volumes are documented.
- RAID state is monitored.
- Filesystems mount automatically after reboot.
- Application data has enough growth capacity.
- Swap behavior is appropriate for the workload.
- Disk encryption keys and recovery are documented.
- Backups are stored outside the array and server.
Ubuntu Server Network Checklist
- IPv4 and IPv6 addresses are correct.
- The default route is correct.
- DNS resolution works.
- The hostname resolves appropriately.
- Reverse DNS is configured when required.
- Only required services listen publicly.
- Firewall rules are documented.
- Time synchronization works.
- Private networks and VLANs are labeled.
- Remote console access is tested.
Common Ubuntu Server Installation Problems
The installer cannot see the disk
Check RAID-controller mode, firmware settings, virtual disk creation, storage drivers, cabling, and whether the disk is already used by another controller or array.
The installer has no network connection
Check physical link, VLAN, DHCP, static addressing, gateway, DNS, interface selection, and driver support. Continue offline only when required packages and updates can be installed later.
The server does not boot after installation
Remove the installation media, verify firmware boot order, confirm UEFI or legacy mode, and check whether the bootloader was installed on the intended disk.
SSH connection is refused
Confirm OpenSSH is installed and running, port 22 is allowed, the IP address is correct, and the network route is available.
sudo systemctl status ssh
sudo ss -ltnp | grep ':22'
sudo ufw status
The server boots into emergency mode
Check filesystem errors, failed mounts, incorrect UUIDs in /etc/fstab, missing encrypted volumes, and unavailable network filesystems.
journalctl -xb
lsblk -f
cat /etc/fstab
Package downloads fail
Check DNS, default route, proxy settings, mirror availability, system time, and certificate validation.
ip route
resolvectl status
timedatectl
sudo apt update
Common Installation Mistakes
- Downloading the wrong architecture: confirm AMD64, ARM64, or another platform.
- Skipping ISO verification: verify checksum and signature.
- Writing the USB image to the wrong disk: confirm the target with
lsblk. - Overwriting existing data: verify every selected installation disk.
- Using an unsupported release: choose a maintained LTS version.
- Creating one tiny root filesystem: plan application data, logs, and growth.
- Exposing SSH with password-only authentication: deploy and test keys.
- Opening every firewall port: use a default-deny policy.
- Installing unnecessary featured software: start with a minimal base.
- Skipping remote-console testing: confirm recovery access before production.
- Treating RAID as backup: keep independent off-server copies.
- Deploying applications before updating: patch and secure the base system first.
- Failing to document storage and network configuration: recovery becomes slower and riskier.
Record a Hardware and Performance Baseline
Capture the server’s state before installing production applications. A baseline helps distinguish application growth from hardware, firmware, driver, or provider changes.
lscpu
free -h
lsblk -o NAME,SIZE,TYPE,FSTYPE,MOUNTPOINTS,MODEL,SERIAL
ip -brief address
ip route
systemd-analyze
systemctl --failed
sudo ss -tulpn
Record:
- CPU model, cores, and threads.
- Installed and available memory.
- Drive models, serial numbers, and filesystems.
- RAID, LVM, and encryption layout.
- Network-interface names and addresses.
- Firmware and remote-management versions.
- Boot duration.
- Idle CPU, memory, and storage usage.
Use provider-approved or non-destructive performance tests. Uncontrolled storage benchmarks can affect other customers, trigger protection systems, or mislead because caches and shared infrastructure influence the results.
Check Hardware Health on Physical Servers
Virtual machines depend on the provider for physical monitoring. Dedicated and on-premises servers require direct health checks.
Monitor:
- Drive health and media errors.
- RAID controller and battery or capacitor state.
- Memory errors.
- CPU and chassis temperatures.
- Fan and power-supply status.
- Network-interface errors.
- Firmware alerts.
- Remote-management event logs.
Install hardware-monitoring tools only when they support the server and controller. Generic SMART output may be unavailable behind a hardware RAID controller, requiring vendor or controller-specific utilities.
Document the physical drive bay, serial number, array member, and replacement process. Removing the wrong disk from a degraded array can turn a recoverable drive failure into data loss.
Plan Kernel, Driver, and Firmware Maintenance
Ubuntu updates can include kernels, CPU microcode, device firmware, storage drivers, and network drivers. These changes may require a reboot.
A production maintenance process should include:
- Review update notices and affected components.
- Confirm current backups and recovery-console access.
- Test on similar non-production hardware when possible.
- Schedule a maintenance window.
- Install updates.
- Reboot when required.
- Verify storage, networking, services, and application health.
- Keep a documented recovery or previous-kernel boot option.
Do not postpone every reboot indefinitely. The running kernel remains unchanged until the server boots into the updated kernel. Monitor /run/reboot-required and set an operational deadline.
Use Automated Installation for Repeatable Fleets
Manual installation works well for one server or for learning the installer. Organizations deploying many similar systems should use repeatable automated installation, configuration management, or image pipelines.
An automated build should define:
- Release and architecture.
- Storage and partitioning.
- Network settings.
- Hostname and identity.
- Administrator SSH keys.
- Package selection.
- Security baseline.
- Monitoring and backup agents.
- Application bootstrap.
Keep secrets outside the installation file and use a protected retrieval process. Test unattended installation in an isolated environment because a storage mistake can erase the wrong disk across many systems.
Create an Upgrade and Lifecycle Plan
An LTS installation still needs lifecycle planning. Record the standard support end date, application certification, upgrade dependencies, and expected hardware lifetime.
Review at least annually:
- Ubuntu release support status.
- Application and control-panel compatibility.
- Storage and memory growth.
- Firmware and hardware support.
- Backup restore results.
- Security and compliance requirements.
- Migration or in-place upgrade strategy.
Test release upgrades on a clone or staging server. For critical systems, building a new server and migrating the workload can provide a clearer rollback path than upgrading the only production machine in place.
Document the Ubuntu Server Build
Keep documentation outside the server. Include:
- Server owner and business purpose.
- Hardware or VM specifications.
- Ubuntu release and installation date.
- Storage, RAID, LVM, encryption, and mount layout.
- Network addresses, routes, DNS, VLANs, and firewall rules.
- Administrator accounts and SSH-key ownership.
- Installed applications and service owners.
- Monitoring and alert contacts.
- Backup destinations, retention, and restore instructions.
- Remote-console and rescue procedures.
- Maintenance windows and lifecycle dates.
A server is not operationally ready if only one person understands its build and recovery process.
Production Readiness Checklist
- Ubuntu 26.04 LTS or another supported release is installed.
- The ISO checksum and signature were verified.
- Firmware mode, boot order, and storage layout are documented.
- All updates are installed.
- A named sudo administrator exists.
- SSH keys work.
- Direct root login is disabled.
- Password authentication is disabled when compatible with the environment.
- The firewall exposes only required ports.
- Time and DNS are correct.
- AppArmor status is reviewed.
- Automatic security updates are configured.
- Monitoring and external alerts work.
- Backups are off-server and restore-tested.
- Recovery-console access is documented.
- The application role has a deployment and rollback plan.
Final Verdict
Ubuntu Server 26.04 LTS suits many new Linux servers in 2026 because it combines a current kernel and software stack with standard security maintenance through May 2031. Key installation decisions include architecture, storage layout, networking, administrator access, and recovery design.
Verify the ISO, document every disk and network setting, install OpenSSH with a secure access plan, update immediately after reboot, enable a restrictive firewall, and configure monitoring and backups before deploying applications. Installation is complete only when administrators can manage the server securely and recover it reliably.
Frequently Asked Questions
How do I install Ubuntu Server?
Download and verify the server ISO, create bootable media, boot the machine, configure language, network, storage, user, and SSH settings, complete installation, reboot, update, secure, monitor, and back up the server.
How much RAM does Ubuntu Server need?
Ubuntu’s basic installation guidance uses 2 GB as a recommended minimum. A practical production server often needs 4 GB or more depending on applications.
Should I install Ubuntu Server 26.04 or 24.04?
Choose 26.04 for a new compatible deployment and the longest remaining standard support. Choose 24.04 when required by certified applications or existing standards.
Does Ubuntu Server have a graphical interface?
The standard server installation is command-line focused. A desktop environment can be added, but it increases resource use and attack surface.
Should I use LVM?
LVM is useful when you want flexible logical volumes and future resizing. Document the layout and maintain independent backups.
Should I install OpenSSH during Ubuntu installation?
Yes when remote administration is required. Import verified keys and harden SSH after installation.
Does Ubuntu Server need antivirus?
It depends on the workload and security requirements. Endpoint protection can add value, but it does not replace patching, firewalls, access control, monitoring, and backups.
Can Ubuntu Server run on a virtual machine?
Yes. Assign suitable CPU, RAM, storage, and networking, attach the ISO, and follow the same installer workflow.
Is Ubuntu Server free?
Ubuntu Server can be downloaded and used without an operating-system license fee. Optional Ubuntu Pro and commercial support services add paid capabilities.
What should I do immediately after installing Ubuntu Server?
Update packages, verify networking and time, configure SSH keys, enable a firewall, set automatic security updates, add monitoring, and create tested off-server backups.
Should Ubuntu Server use guided LVM, encrypted storage, or a manual partition layout for a production installation?
A careful Ubuntu Server installation includes ISO verification, network planning, secure administrator credentials, OpenSSH, storage decisions, updates, firewall rules, and post-installation hardening.
Before moving production workloads, it is useful to document the build, test remote access, confirm backups, and verify that the server can recover after a reboot.
For a production Ubuntu Server installation, I would like guidance on decisions that are easy to overlook during setup: static networking, hostname, storage layout, LVM, disk encryption, time zone, administrator account, OpenSSH, and automatic security updates. The best partitioning choice may differ between a simple web server, database server, Docker host, and machine with separate data disks. It would also help to include a post-install checklist covering package updates, SSH keys, firewall rules, fail2ban or equivalent protection, monitoring, backups, and verification that remote access still works before closing the console.
Verifying the Ubuntu Server ISO checksum and signature before creating installation media is a small step that helps confirm the image was downloaded correctly and has not been modified.
After installing Ubuntu Server, I would test DNS, outbound connectivity, SSH key access, sudo permissions, time synchronization, disk mounts, firewall rules, and backup jobs before deploying the application.