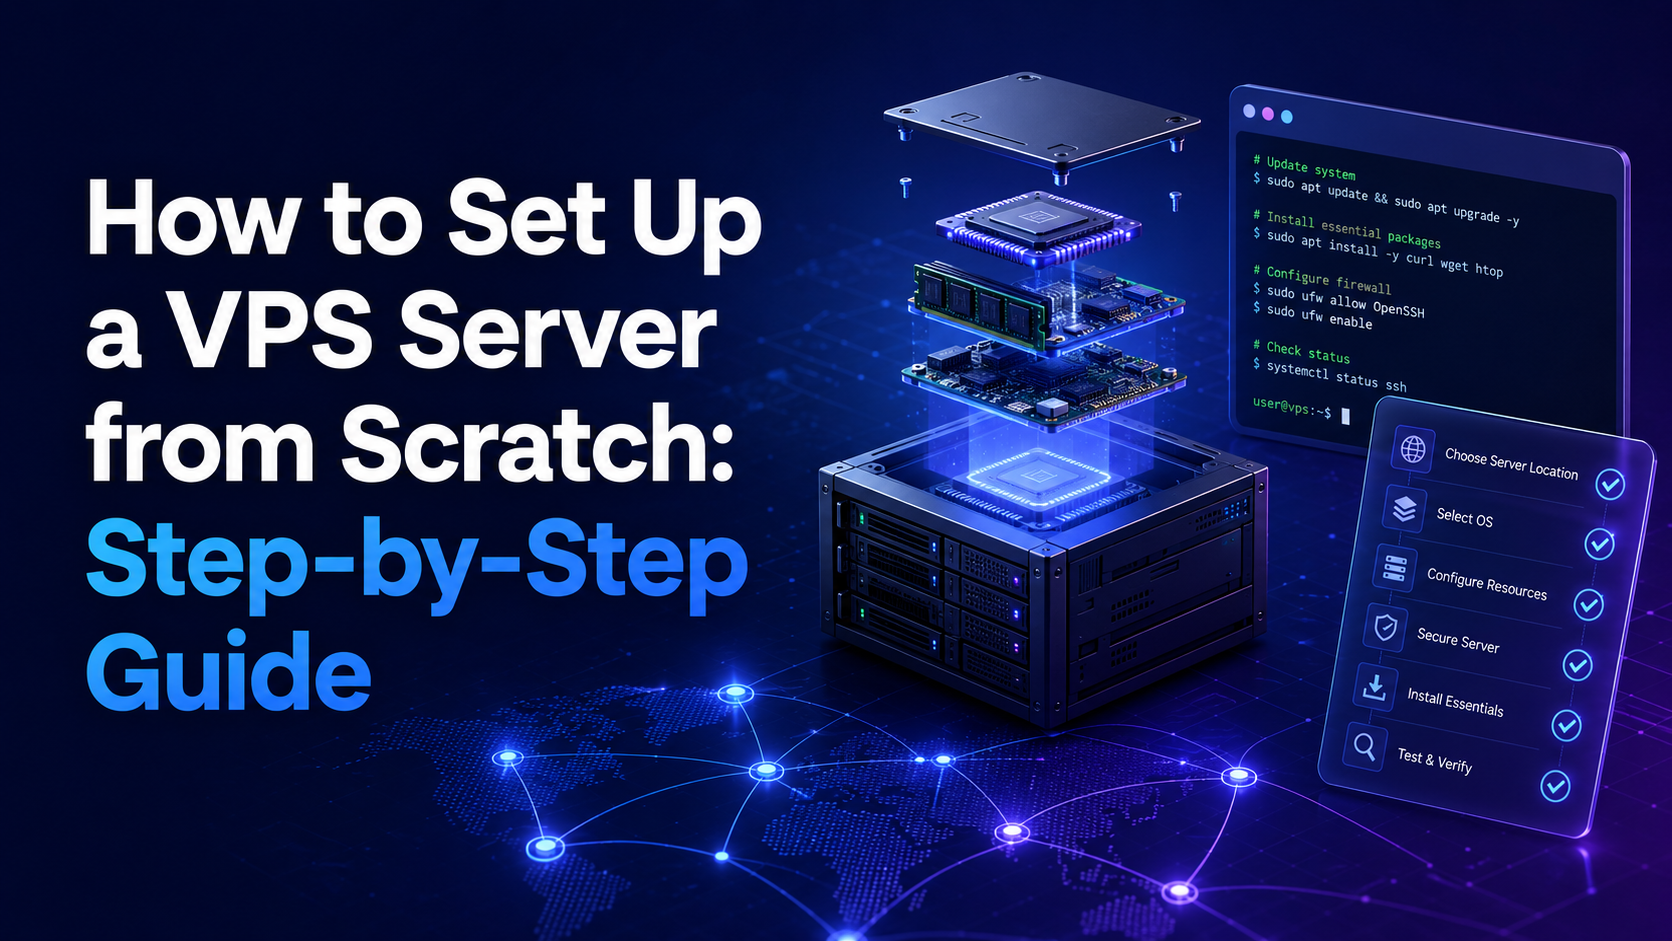
To set up a VPS from scratch, choose the right plan and server location, deploy a supported operating system, connect through SSH, create a non-root administrator, update the system, configure the hostname and time zone, secure remote access, enable a firewall, add swap when appropriate, install monitoring and backups, and then deploy the application stack.
The command examples use Ubuntu 26.04 LTS because it is the current Ubuntu LTS release in July 2026. They also work on Ubuntu 24.04 LTS and recent Debian releases. AlmaLinux, Rocky Linux, and other distributions use different package and firewall commands.
This guide covers a general Linux VPS, not one specific website or application. Complete the base configuration first, then install Nginx, Apache, Docker, a control panel, a database, a VPN, a game server, or another workload. If the workload is a blockchain masternode, compare managed and self-managed masternode hosting options before choosing the VPS.
What You Need Before Setting Up a VPS
- A VPS provider account.
- A selected server plan and data-center location.
- A public IPv4 or IPv6 address.
- Initial root credentials or an SSH key.
- An SSH client on your computer.
- A domain name if the server will host a public service.
- A secure location for credentials and recovery information.
- A clear plan for the server’s purpose.
Windows users can connect from PowerShell, Windows Terminal, or another SSH client. Mac and Linux include an SSH client in the terminal. Users who want a Linux shell on older Windows systems can review How to Install Linux Bash on Windows 10.
VPS Setup Process Overview
| Stage | Main task | Result |
|---|---|---|
| 1 | Choose resources and location | A suitable VPS plan |
| 2 | Deploy the operating system | A bootable server |
| 3 | Connect through SSH | Remote command-line access |
| 4 | Create an administrator | Safer daily administration |
| 5 | Update packages | Current security and bug fixes |
| 6 | Configure identity and time | Correct hostname, DNS, and logs |
| 7 | Harden SSH and firewall | Reduced remote exposure |
| 8 | Configure storage and swap | Stable resource behavior |
| 9 | Add monitoring and backups | Detection and recovery |
| 10 | Deploy the workload | A production-ready service |
Step 1: Choose the Right VPS Plan
Match resources to the workload instead of starting with the cheapest advertised plan. CPU, RAM, storage, transfer, location, virtualization, backup options, and support all affect the result. The comparison of the cheapest VPS providers shows how introductory pricing, renewal rates, and hidden limits differ between vendors.
| Workload | vCPU | RAM | Storage starting point |
|---|---|---|---|
| Learning, DNS, small bot, or VPN | 1 | 1–2 GB | 20–30 GB SSD |
| Small website or API | 1–2 | 2–4 GB | 30–60 GB NVMe or SSD |
| WordPress or several sites | 2–4 | 4–8 GB | 60–120 GB NVMe |
| Small e-commerce or application stack | 4+ | 8 GB+ | 100 GB+ NVMe |
| Database, game server, or multiple containers | Workload specific | 8–16 GB+ | Measured from data and growth |
Treat these as planning ranges. A cached static site and a database-heavy store can have very different needs even with similar visitor numbers. If measurements show the workload consistently exceeds an economical VPS plan, the comparison of VPS vs dedicated server vs cloud hosting explains when to move to exclusive hardware.
Shared vs dedicated vCPU
Shared vCPU is suitable for general websites, development, and variable workloads. Dedicated or reserved vCPU is better for sustained computation, busy databases, game servers, and latency-sensitive services. Confirm how the provider allocates CPU resources.
Choose SSD or NVMe storage
NVMe can lower storage latency for databases, package installation, logging, and dynamic applications. Storage performance also depends on provider limits, replication, host load, and whether the disks are local or network attached. The comparison of SSD vs HDD for servers explains why drive latency often matters more than raw capacity.
Check virtualization type
KVM-based VPS plans provide strong isolation and broad operating-system support. Containers can be efficient but may impose more kernel and feature restrictions. Users planning virtual machines or Android emulators inside the VPS should review VPS with Nested Virtualization.
Step 2: Choose the Best Server Location
Choose a data center near most users or the external services the VPS must contact. A nearby location normally reduces network latency, but routing and peering also matter.
Compare:
- Latency from target users.
- Packet loss and routing stability.
- Regional pricing.
- Data-protection and legal requirements.
- DDoS protection.
- Backup regions.
- Support and remote-hands availability.
- Disaster-recovery options.
Use How to Choose the Best Server Location and Best Server Location for Low Latency to compare regions.
Step 3: Select and Deploy the Operating System
For a new general-purpose Linux VPS, an LTS distribution is usually the most practical choice. Ubuntu 26.04 LTS, Ubuntu 24.04 LTS, Debian, AlmaLinux, and Rocky Linux are common options.
Choose an operating system based on:
- Application compatibility.
- Support lifecycle.
- Administrator experience.
- Control-panel requirements.
- Vendor documentation.
- Package versions.
- Security-update process.
Review Best Server OS in 2026 before deployment. Users replacing CentOS should also read CentOS Replacement in 2026. If the provider supplies only an ISO rather than a prepared image, follow the full walkthrough on how to install Ubuntu Server.
Choose an image with SSH key support
If the provider supports it, upload your public SSH key before deployment. This can eliminate initial password login. Generate a local Ed25519 key:
ssh-keygen -t ed25519 -a 100Keep the private key on your device and add only the public key to the provider.
Record deployment details
- Server name.
- Operating-system version.
- Public and private IP addresses.
- Data-center location.
- Plan resources.
- Root access method.
- Provider firewall state.
- Billing and renewal date.
- Recovery-console procedure.
Step 4: Connect to the VPS Through SSH
Use the server IP provided by the host:
ssh root@SERVER_IPOn first connection, SSH displays the host-key fingerprint. Compare it with the fingerprint shown in the provider dashboard when available. Accepting an unverified key can expose you to a man-in-the-middle attack.
If the server uses a custom port:
ssh -p 2222 root@SERVER_IPIf a private key is stored in a non-default location:
ssh -i ~/.ssh/my_vps_key root@SERVER_IPTroubleshoot connection problems
Check:
- The server is powered on.
- The IP address is correct.
- Port 22 or the custom SSH port is allowed by the provider firewall.
- Your local network does not block the port.
- The username matches the image.
- The private key has appropriate file permissions.
Test port reachability using the methods in Port Ping: How to Ping a Specific Port.
Step 5: Create a Non-Root Administrator
Create a named account and add it to the sudo group:
adduser adminuser
usermod -aG sudo adminuser
Copy the root account’s authorized keys to the new user when the initial login used an SSH key:
rsync --archive --chown=adminuser:adminuser ~/.ssh /home/adminuserOpen a second terminal and test:
ssh adminuser@SERVER_IP
sudo whoami
Do not continue to SSH hardening until this works.
Step 6: Update the VPS
Update package information and install available upgrades:
sudo apt update
sudo apt upgrade -y
Remove packages that are no longer required:
sudo apt autoremove --purge -yCheck for a required reboot:
test -f /run/reboot-required && echo "Reboot required"After rebooting, reconnect and check for failed services:
systemctl --failedInstall basic administration tools
sudo apt install -y curl wget git unzip zip rsync \
  ca-certificates gnupg lsof htop tmux
Install only the packages you need to limit future maintenance.
Step 7: Configure the Hostname
Set a clear fully qualified hostname:
sudo hostnamectl set-hostname server1.example.comCheck it:
hostnamectl
hostname -f
Edit /etc/hosts so the hostname resolves locally:
sudo nano /etc/hostsExample:
127.0.0.1 localhost
127.0.1.1 server1.example.com server1
Do not replace provider network entries unless you understand their purpose.
Step 8: Configure DNS
For a website or API, create an A record pointing the hostname to the server’s public IPv4 address. Create an AAAA record only when IPv6 is configured and tested.
| Record | Name | Value |
|---|---|---|
| A | @ or server hostname | VPS IPv4 address |
| AAAA | @ or server hostname | VPS IPv6 address |
| CNAME | www | Main hostname |
DNS changes can take time to appear because recursive resolvers cache records. Use a lower TTL before a planned migration, then raise it after the service is stable.
Ask the VPS provider to configure reverse DNS when the server sends mail or when reverse resolution is operationally important. A forward DNS record does not automatically create reverse DNS.
Step 9: Set the Time Zone and Verify Time Synchronization
Accurate time is essential for logs, certificates, authentication, databases, and incident investigation.
List time zones:
timedatectl list-timezonesSet the server time zone:
sudo timedatectl set-timezone UTCUTC is a practical default for servers because it avoids daylight-saving changes and makes logs easier to compare across regions.
Verify time synchronization:
timedatectl statusStep 10: Configure SSH Key Authentication
If the new administrator does not already have a key, copy it from your local computer:
ssh-copy-id adminuser@SERVER_IPTest the key in a separate terminal. Then create a hardening drop-in file:
sudo nano /etc/ssh/sshd_config.d/99-custom.confExample:
PermitRootLogin no
PubkeyAuthentication yes
PasswordAuthentication no
PermitEmptyPasswords no
MaxAuthTries 3
LoginGraceTime 30
AllowUsers adminuser
Validate and reload:
sudo sshd -t
sudo systemctl reload ssh
Do not close your current session. Confirm that a new SSH connection works first.
Step 11: Configure the Firewall
Install and configure UFW:
sudo apt install ufw -y
sudo ufw default deny incoming
sudo ufw default allow outgoing
sudo ufw allow OpenSSH
sudo ufw enable
sudo ufw status verbose
If the server will host a website:
sudo ufw allow 80/tcp
sudo ufw allow 443/tcp
If you changed the SSH port, allow the new port before enabling or reloading firewall rules.
Use a provider-level firewall as an additional layer when available. Keep the provider and host rules documented so troubleshooting does not become confusing. The how to secure a VPS checklist covers firewall design, login protection, and the remaining hardening steps in more depth.
Step 12: Add Swap When Appropriate
Swap provides disk-backed memory when RAM pressure rises. It can reduce sudden process termination on a small VPS, but it is much slower than RAM and does not fix an undersized server.
Check existing swap:
swapon --show
free -h
Create a 2 GB swap file:
sudo fallocate -l 2G /swapfile
sudo chmod 600 /swapfile
sudo mkswap /swapfile
sudo swapon /swapfile
Make it persistent:
echo '/swapfile none swap sw 0 0' | sudo tee -a /etc/fstabVerify:
swapon --show
free -h
Some container-based VPS platforms do not allow customer-managed swap. Confirm provider limits. Monitor swap activity; sustained swapping indicates insufficient RAM or an application problem.
Step 13: Configure Automatic Security Updates
Install and verify unattended upgrades:
sudo apt install unattended-upgrades -y
sudo unattended-upgrade --dry-run --debug
Review:
cat /etc/apt/apt.conf.d/20auto-upgrades
sudo less /var/log/unattended-upgrades/unattended-upgrades.log
Pair automatic security updates with monitoring and planned reboots. Do not assume that every service continues working after an update without health checks.
Step 14: Install Login Protection
Install Fail2ban when the server has public login services:
sudo apt install fail2ban -yCreate an SSH jail:
sudo nano /etc/fail2ban/jail.d/sshd.local[sshd]
enabled = true
backend = systemd
bantime = 1h
findtime = 10m
maxretry = 5Enable and verify:
sudo systemctl enable --now fail2ban
sudo fail2ban-client status sshd
Treat Fail2ban as a supplementary control. SSH keys, firewall restrictions, updates, and strong provider-account security remain more important.
Step 15: Configure Monitoring
At minimum, monitor availability, CPU, memory, disk space, storage latency, network traffic, failed services, and application health.
Check the server manually:
uptime
free -h
df -h
sudo ss -tulpn
systemctl --failed
journalctl -p warning --since today
Install a lightweight interactive monitor:
sudo apt install htop -y
htop
For ongoing monitoring, compare options in Best Linux System Monitor in 2026 and The Best Server Management Tool.
Create alerts before production launch
- Server offline.
- Service unavailable.
- Disk above 80–90%.
- High sustained CPU.
- Low available memory.
- Backup failed.
- Certificate expiring.
- Repeated login failures.
- Unexpected reboot.
Step 16: Configure Backups
Back up application files, databases, configuration, certificates, scheduled tasks, and deployment instructions. Keep at least one copy outside the VPS.
Plan for:
- Automatic schedule.
- Retention.
- Encryption.
- Off-server destination.
- Backup monitoring.
- Restore testing.
- Recovery documentation.
Follow How to Back Up and Restore Data on a VPS for detailed implementation and testing guidance.
Step 17: Choose a Server Management Method
You can manage the VPS through the command line, a general server dashboard, or a web hosting control panel.
| Method | Best for | Consideration |
|---|---|---|
| Command line | Developers and administrators | Maximum control and lowest overhead |
| Server dashboard | Monitoring and common administration | Adds another application to secure |
| Hosting control panel | Multiple websites, email, DNS, and customers | Licensing, updates, and resource use |
| Configuration management | Multiple servers and repeatable builds | Requires automation skills |
Compare Best Control Panel for Linux VPS, Best Web Hosting Control Panel, and Plesk vs cPanel before installing a panel.
Step 18: Deploy the Application Stack
After the base VPS is secure and monitored, install only the software required for the workload.
Web server options
- Nginx for reverse proxying and web serving.
- Apache for broad module and application compatibility.
- Caddy for simple automatic HTTPS workflows.
The walkthrough on how to host a website on a VPS covers Nginx server blocks, PHP-FPM, reverse proxying, and deployment structure.
Database options
- MariaDB or MySQL for common web applications.
- PostgreSQL for relational applications requiring its feature set.
- Redis for caching, sessions, and selected queue workloads.
Deployment options
- Native packages and systemd services.
- Docker or another container platform.
- A control panel.
- Automated configuration management.
- A Git-based deployment pipeline.
Developers building private source control can review How to Run Your Own Git Server. File-sharing deployments may use How to Install Nextcloud on a VPS or Configure an NFS Server and Client. For a long-running bot or similar always-on service managed by systemd, see the tutorial on how to host a Discord bot on a VPS. For provider shortlists, compare our best Nextcloud hosting providers or, for the automation use case, the best Hermes Agent hosting providers.
Step 19: Configure HTTPS
Public web applications should use HTTPS. Obtain a certificate from a trusted certificate authority, configure automatic renewal, redirect HTTP to HTTPS when appropriate, and monitor certificate expiry.
Before requesting a certificate:
- The domain must resolve to the VPS.
- Port 80 or the required validation method must be reachable.
- The web server must have a correct virtual host.
- The firewall must allow HTTP and HTTPS.
Test renewal and confirm that the web server reloads the renewed certificate.
Step 20: Verify the Final VPS Configuration
Run a final review:
cat /etc/os-release
hostnamectl
timedatectl
systemctl --failed
sudo ufw status verbose
sudo sshd -T
sudo ss -tulpn
free -h
df -h
swapon --show
sudo fail2ban-client status
journalctl -p warning --since today
Test from an external network:
- SSH key login.
- Required website or application ports.
- HTTPS and certificate chain.
- Application login and transactions.
- Monitoring alerts.
- Backup completion.
- File and database restoration.
- Provider console access.
Recommended VPS Directory and Documentation Plan
Keep operational documentation outside the server and record:
- Server purpose and owner.
- Provider, plan, and region.
- IP addresses and DNS records.
- Operating-system version.
- Administrator accounts.
- Open ports and reasons.
- Installed services.
- Configuration locations.
- Backup destinations and retention.
- Monitoring contacts.
- Certificate renewal method.
- Deployment and rollback steps.
- Recovery-console instructions.
- Cancellation and renewal date.
Common VPS Setup Mistakes
- Choosing the absolute cheapest plan: insufficient RAM creates instability and emergency migration work.
- Using an unsupported operating system: security updates may be unavailable.
- Logging in as root permanently: use a named sudo account.
- Disabling SSH passwords before testing keys: this can lock you out.
- Enabling a firewall before allowing SSH: new connections may fail.
- Opening database ports publicly: use localhost, private networks, or restricted sources.
- Installing a control panel without checking requirements: panels can conflict with existing software.
- Skipping monitoring: users become the first outage alert.
- Keeping backups only on the server: one failure can remove everything.
- Using snapshots as the entire recovery plan: snapshots need independent backup and restore procedures.
- Ignoring server location: distant regions can add unnecessary latency.
- Installing many services on one small VPS: resource contention and attack surface increase.
- Never documenting changes: recovery becomes slow and dependent on one person.
Establish a Performance Baseline
Record a baseline while the VPS is new and lightly loaded. Future measurements can then show whether performance changed because of application growth, an update, a provider issue, or a configuration mistake.
Capture:
- CPU model and virtual CPU count.
- Total and available memory.
- Disk capacity and filesystem type.
- Basic storage latency and throughput using a safe provider-approved method.
- Network latency to users and important external services.
- Idle CPU and memory use.
- Normal boot time.
- List of enabled and listening services.
Useful commands include:
lscpu
free -h
lsblk -f
df -h
ip address
ip route
systemd-analyze
systemctl list-unit-files --type=service --state=enabled
sudo ss -tulpn
Avoid uncontrolled disk benchmarks on shared hosting because they can affect other customers or violate acceptable-use rules. Use application-level load tests and provider-approved benchmark methods.
Create a Staging and Change Process
A production VPS should not be the first place where a new package, control-panel update, database migration, or firewall rule is tested. A small staging VPS or reproducible local virtual machine can prevent avoidable outages.
Use this change process:
- Record the reason for the change.
- Back up affected data and configuration.
- Test the change in staging.
- Define success checks and rollback steps.
- Schedule the production change.
- Monitor logs, resources, and application health.
- Update documentation after completion.
For small projects, staging may be a temporary clone created only during important upgrades. Remove or secure temporary servers after testing so they do not become forgotten attack targets.
Plan a VPS Migration Before You Need One
Providers, applications, pricing, and resource requirements change. Build the VPS so it can be moved without depending on one undocumented dashboard feature.
Keep portable copies of:
- Application source and deployment instructions.
- Database backups.
- Web-server and service configuration.
- DNS records.
- Certificate and renewal configuration.
- Scheduled jobs.
- Firewall rules.
- Package lists and software versions.
- Monitoring configuration.
- User and access records.
Use DNS names instead of hardcoding IP addresses where possible. Before a migration, lower DNS TTL, build and test the new server, synchronize data, plan the cutover, and keep the old server available for rollback until the new environment is verified.
Estimate the Full VPS Cost
The advertised server price is only one part of operating cost. Include:
- Regular and renewal price.
- Public IPv4 charges.
- Backup and snapshot storage.
- Additional block storage.
- Bandwidth overages.
- Control-panel and Windows licenses.
- Monitoring and log retention.
- DDoS protection.
- Administrator time.
- Migration and emergency support.
A slightly more expensive VPS with enough RAM, reliable backups, and a suitable location can cost less than an undersized plan that requires repeated troubleshooting and migration.
Decide When the VPS Is Ready for Production
The server is ready only after the complete service—not just the operating system—has been tested.
| Area | Production readiness test |
|---|---|
| Access | Named administrator, SSH keys, provider console, and recovery credentials verified |
| Network | Only required ports exposed; DNS and reverse DNS correct where needed |
| Security | Updates, firewall, login protection, permissions, and provider MFA enabled |
| Application | Core user actions, error handling, and dependencies tested |
| Performance | Representative load tested with resource headroom |
| Monitoring | Availability, resource, service, certificate, and backup alerts delivered |
| Recovery | File and database restore completed successfully |
| Documentation | Another administrator can operate and recover the service |
Launch during a period when someone can monitor the VPS and respond. Check application logs, resource use, DNS, certificates, and backups closely during the first days of production.
VPS Launch Checklist
- The VPS plan matches the workload.
- The server location is close to users or dependencies.
- The operating system is supported.
- The provider console and rescue process work.
- A named administrator account has sudo access.
- SSH key authentication works.
- Direct root login is disabled.
- The system is fully updated.
- Hostname, DNS, time zone, and time sync are correct.
- Only required firewall ports are open.
- Swap is configured when appropriate.
- Automatic security updates are enabled and monitored.
- Monitoring and external alerts work.
- Backups are off-server and restore-tested.
- HTTPS is configured for public web services.
- Application and database access are restricted.
- Deployment and recovery steps are documented.
Final Verdict
A well-configured VPS begins with a suitable plan, supported operating system, safe administrative access, current packages, a default-deny firewall, monitoring, and recoverable backups. Install applications only after this foundation is in place.
Use Ubuntu 26.04 LTS or another supported distribution, test SSH changes from a second session, keep provider-console access available, and document every open port and installed service. Start with the smallest plan that has realistic headroom, monitor actual use, and scale only when the data shows a bottleneck.
Frequently Asked Questions
How do I set up a VPS for the first time?
Deploy a supported operating system, connect through SSH, create a sudo user, update packages, configure SSH keys and a firewall, then add monitoring, backups, and the application stack.
Which operating system is best for a VPS?
Ubuntu LTS and Debian are common general-purpose choices. AlmaLinux and Rocky Linux fit users who prefer an enterprise Linux ecosystem. Choose based on application support and administrator experience.
How much RAM does a basic VPS need?
One to two GB can support learning and very small services. Two to four GB is a more practical starting point for a small website, while WordPress and databases often benefit from four GB or more.
Do I need swap on a VPS?
Swap can help a small Linux VPS survive short memory spikes, but it is slower than RAM and does not replace adequate memory. Some providers restrict swap.
Should I use root to manage a VPS?
Use root only for initial setup or recovery. Create a named administrator and use sudo for privileged tasks.
Should I change the SSH port?
It can reduce automated scan noise, but SSH keys, firewall restrictions, updates, and monitoring provide more meaningful protection.
Can I host multiple websites on one VPS?
Yes. Use separate virtual hosts, application users, databases, certificates, and backups. A control panel can simplify multi-site management.
Do I need a control panel?
No. The command line has the lowest overhead and maximum control. A panel is useful when managing many websites, email accounts, DNS zones, or customers.
Are VPS snapshots enough for backup?
No. Use off-server backups with retention, monitoring, encryption, and tested restoration.
How long does it take to set up a VPS?
Basic deployment may take less than an hour, but secure application setup, DNS, monitoring, backups, testing, and documentation require additional work.
Latest Hosting Guides
VPS Hosting for Kubernetes: Complete Guide for 2026
VPS Hosting for Docker Containers: Complete Guide for 2026
VPS Hosting for Redis: Complete Guide for 2026
VPS Hosting for Elasticsearch: Complete Guide for 2026
How to Host a Discord Bot on a VPS in 2026: Complete Step-by-Step Guide
Swipe or scroll to explore more guides
After deploying a new VPS, which setup steps should be completed before installing the main application?
A clean VPS setup should include system updates, a non-root administrator, SSH keys, firewall rules, time synchronization, hostname configuration, monitoring, backups, and restricted network services.
Documenting the initial server configuration makes future recovery and scaling easier. Infrastructure automation can also reduce mistakes when the same VPS setup must be repeated.
A VPS setup checklist should separate the initial server build from application deployment. I would first choose the region and resources, deploy a supported OS, confirm console access, create a non-root sudo user, configure SSH keys, update packages, set the hostname and time zone, enable a firewall, and add swap only when appropriate. After that, configure monitoring, backups, log rotation, automatic security updates, and application-specific services. It would also help to explain how to document the setup so the VPS can be rebuilt consistently instead of becoming a one-off manual server.
A provider snapshot taken before major changes can make rollback easier, but snapshots should not replace regular off-server backups or application-aware database backups.
A new VPS should have uptime, CPU, memory, disk, service, and backup monitoring before it hosts an important workload. Waiting for the first outage to add alerts is too late.